Dec 21
Install Shairport Sync with AirPlay 2 on Raspberry Pi Zero 2 W and Waveshare PCM5122 DAC
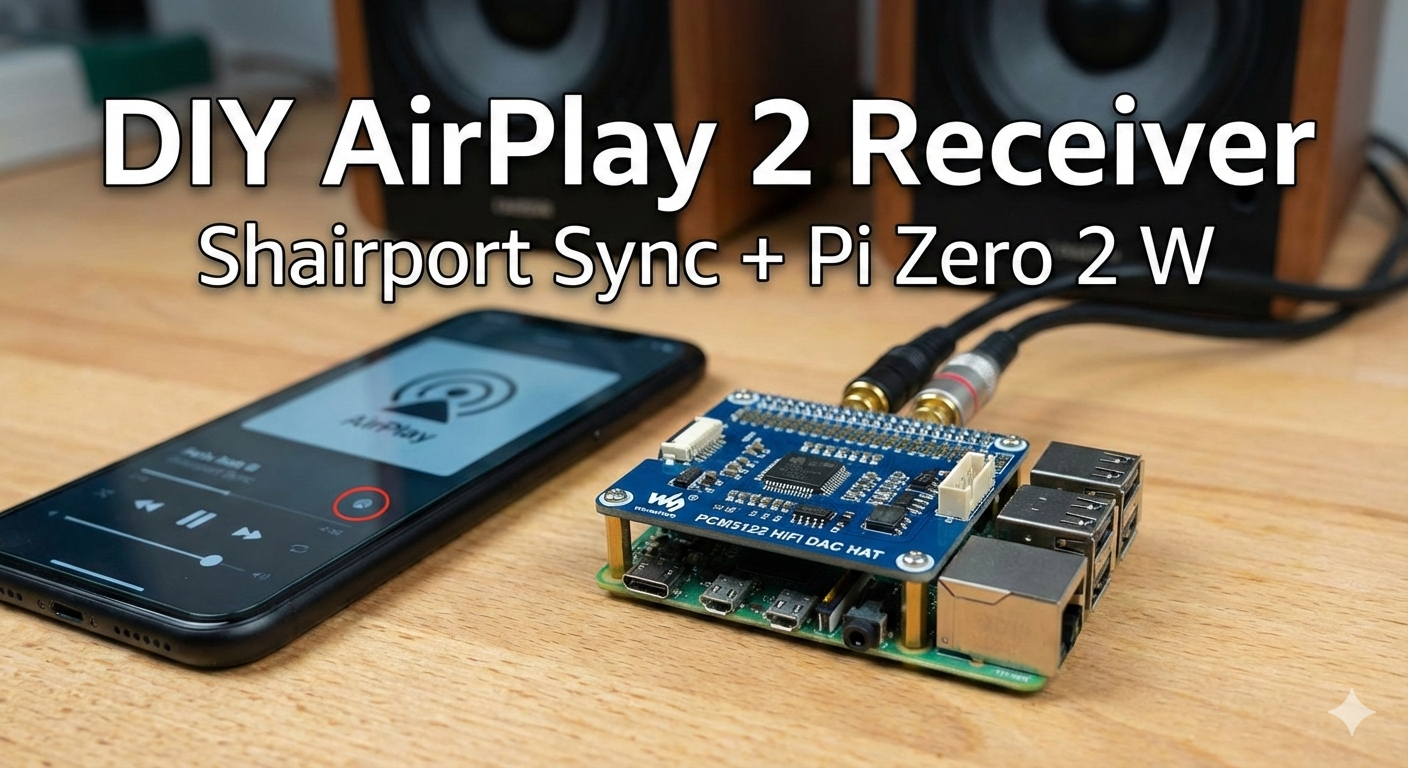
The Raspberry Pi Zero 2 W may be tiny, but paired with a proper DAC it becomes a surprisingly capable network audio streamer. In this guide, we'll build a high-fidelity AirPlay 2 receiver using Shairport Sync, enabling multi-room playback, tight clock synchronization, and excellent resampling quality.
This setup is ideal if you want an affordable, always-on AirPlay endpoint that integrates seamlessly with Apple devices—without compromising audio quality.
🛠 Hardware Requirements
You'll need the following components:
- Raspberry Pi Zero 2 W
- Waveshare PCM5122 HiFi I2S DAC
(exposed to ALSA asIQaudIODAC) - MicroSD Card (8 GB or larger)
- Power supply and speakers / amplifier
Step 1: Flash and Boot Raspberry Pi OS
- Flash the OS
Use the official Raspberry Pi Imager and select Raspberry Pi OS Lite (64-bit). - Pre-configure the Image
Before flashing, click the ⚙️ Edit Settings icon and configure:
- Hostname (for example:
hifi-pi) - Enable SSH
- Wi-Fi credentials
- Boot the Pi
Attach the Waveshare PCM5122 DAC to the GPIO header, insert the SD card, and power on the Pi. - Connect via SSH
ssh pi@hifi-pi.local
Hardware Verification
The Waveshare PCM5122 DAC loads its firmware automatically. Verify that ALSA detects it correctly:
aplay -l
You should see output similar to:
card 0: IQaudIODAC [IQaudIODAC], device 0: IQaudIO DAC HiFi pcm512x-hifi-0
If the device appears as shown above, the hardware is ready.
Step 2: Install Build Dependencies
Shairport Sync with AirPlay 2 support requires several libraries for audio processing, encryption, and networking. Update your system and install the required packages:
sudo apt update && sudo apt upgrade -y
sudo apt install --no-install-recommends \
  build-essential git autoconf automake libtool \
  libpopt-dev libconfig-dev libasound2-dev \
  avahi-daemon libavahi-client-dev \
  libssl-dev libsoxr-dev \
  libplist-dev libsodium-dev \
  libavutil-dev libavcodec-dev libavformat-dev \
  uuid-dev libgcrypt-dev xxd
Step 3: Install NQPTP (Required for AirPlay 2)
AirPlay 2 relies on NQPTP (Not Quite Precision Time Protocol) for accurate clock synchronization across devices. Without it, multi-room playback will not work correctly.
cd ~
git clone https://github.com/mikebrady/nqptp.git
cd nqptp
autoreconf -fi
./configure --with-systemd-startup
make
sudo make install
sudo systemctl enable nqptp
sudo systemctl start nqptp
Step 4: Build Shairport Sync with AirPlay 2 Support
Now we compile Shairport Sync from source to enable AirPlay 2, metadata, and Systemd integration.
- Clone the Repository
cd ~
git clone https://github.com/mikebrady/shairport-sync.git
cd shairport-sync
- Configure and Build
autoreconf -fi
./configure \
  --sysconfdir=/etc \
  --with-alsa \
  --with-soxr \
  --with-avahi \
  --with-ssl=openssl \
  --with-systemd \
  --with-airplay-2 \
  --with-metadata \
  --with-systemdsystemunitdir=/lib/systemd/system
make
sudo make install
⚠️ The
autoreconfstep can take a while on the Pi Zero 2 W. This is normal—grab a coffee and let it finish.
Step 5: Configure Shairport Sync
Next, we'll configure Shairport Sync for high-quality output using SoXR resampling and the PCM5122 DAC.
- Open the configuration file:
sudo nano /etc/shairport-sync.conf
- Replace the contents with the following configuration:
general =
{
  name = "Living Room Pi";
  interpolation = "soxr";
  volume_control_profile = "dasl_tapered";
};

audio_backend =
{
  type = "alsa";
};

alsa =
{
  output_device = "plughw:CARD=IQaudIODAC,DEV=0";
  mixer_control_name = "";
};

airplay =
{
  enable_airplay_2 = "yes";
};

metadata =
{
  enabled = "yes";
  include_cover_art = "yes";
};
- Save and exit (
Ctrl+O,Enter,Ctrl+X).
Step 6: Enable and Start the Service
Enable Shairport Sync so it starts automatically on boot:
sudo systemctl enable shairport-sync
sudo systemctl start shairport-sync
You can verify its status with:
systemctl status shairport-sync
Step 6: Disable Wi-Fi Power Saving (Recommended)
By default, Raspberry Pi OS enables Wi-Fi power saving to reduce energy consumption. While useful for battery-powered devices, it can cause audio dropouts, increased latency, or AirPlay discovery issues on always-on streamers.
For a stable AirPlay 2 experience, it's best to disable Wi-Fi power management.
To disable Wi-Fi power saving permanently, create a systemd service.
- Create the service file:
sudo nano /etc/systemd/system/wifi-powersave-off.service
- Paste the following content:
[Unit]
Description=Disable WiFi Power Save
After=network.target

[Service]
Type=oneshot
ExecStart=/sbin/iw dev wlan0 set power_save off
RemainAfterExit=yes

[Install]
WantedBy=multi-user.target
- Enable and start the service:
sudo systemctl daemon-reload
sudo systemctl enable wifi-powersave-off
sudo systemctl start wifi-powersave-off
Verify Status
You can confirm Wi-Fi power saving is disabled with:
iw dev wlan0 get power_save
Expected output:
Power save: off
🎉 Enjoy High-Fidelity AirPlay 2 Streaming
Your Raspberry Pi Zero 2 W is now a fully-featured AirPlay 2 receiver.
- Multi-Room Audio
Group it with HomePods, Apple TVs, or other AirPlay 2 speakers. - Excellent Sound Quality
SoXR provides high-quality resampling tailored for the PCM5122 DAC. - Seamless Apple Integration
"Living Room Pi" will appear instantly in the AirPlay speaker list on iOS and macOS.
For a device that costs only a fraction of commercial streamers, the result is remarkably close to a professional-grade solution.
Happy listening 🎧